Purchasing a Bespoke Metrology Fixture – the Verus Customer Journey
One of the key services we offer at Verus Metrology is the design and manufacture of bespoke, highly innovative, and efficiency saving metrology fixtures. This service is in addition to the complete turnkey metrology services we provide and is one of the things that makes us stand out from the competition.
You can find out more about our capabilities and experience designing and developing fully customised metrology fixtures by visiting our website.
What about the process of purchasing a new metrology fixture, however? What can you expect?
The Verus Customer Journey
Our customer journey for purchasing a bespoke metrology fixture has seven main steps:
- Understanding your needs
- First concept design qualification
- Second detailed design qualification
- Manufacturing
- Post anodising
- Assembly
- Installation qualification
Let’s look at each in more detail.
Step 1 – Understanding Your Needs
Our team will start by gathering information about your requirements. This includes:
- 2D drawings
- 3D solid models
- Component samples
- And anything else you can give us
Our process in this initial step includes:
- Confirming gage R&R requirements and procedures
- Confirming the component dimensions that need to be measured
- Equivalency testing to ensure the proposed fixture is compatible with your metrology machine
Overall, our goal is to agree everything with you during this initial stage to ensure the smooth delivery of the rest of the project.
Step Two – First Concept Design Qualification
We’ll appoint a lead project designer at this stage to take the project forward. We’ll then develop a concept design that, while basic, will:
- Provide information about the proposed fixture
- Capture the dimensions
- Demonstrate the size of the fixture
We’ll present this concept design to you for feedback. Modifications will then be made based on your feedback until you are satisfied with the design.
At this stage of the process, we can also complete a Proof of Principle if you need it.
Step 3 – Second Detailed Design Qualification
In this stage, the lead project designer will give a presentation to you outlining:
- The exact dimensions of your fixture
- The required elements and resources
- What the fixture will look like (with an in-depth representation)
- How the fixture will operate and capture all your metrology requirements
The final action in this stage is for both you and the lead project designer to sign off the design ready for manufacturing.
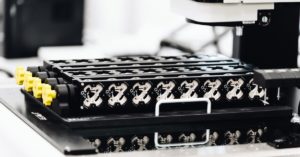
Step 4 – Manufacturing
Our experienced manufacturing engineers look after this part of the process. It starts with them determining the precise quantity of raw materials and standard parts required.
It’s important to note that all the materials and parts we use when manufacturing metrology fixtures are of the highest quality. This includes medical engineering plastic and aerospace-grade aluminium.
We’ll then manufacture your fixture before sending it for sandblasting. Then, in the final stage of this step, we’ll anodise the fixture to give it a protective layer.
Step 5 – Post Anodising
This step involves adding the final elements you require such as laser engraving the fixture with your contact details, asset numbers, and anything else you need.
Step 6 – Assembly
In this step, we’ll assemble your fixture and give it a full visual and dimensional check to ensure it has been manufactured as per the agreed design. It will then be passed to our metrology lab.
In our metrology lab, we will:
- Run and finalise the gage R&R
- Create a report using Minitab that outlines all the variables that impact the fixture’s results
- Decide if the fixture passes or fails our tests, with a standard below 10 percent tolerance for a pass
You’ll then get a full report on our test results to approve.
Step 7 – Installation Qualification
We can ship the fixture to you for installation, or we can send an engineer to your facility to assist you. You will also receive a backup and installation report along with full programmes.
Post Installation
Your fixture will be operational at your facility by this stage, but our service doesn’t end there. This is because six months after installation we will follow up with you to ensure the fixture is performing correctly.
Then, every 12 months, we will visit your facility to check for wear or damage. If you require it, we can also carry out a Type 1 gage R&R to compare the results with the first set.
Getting Started
Before any of the above can begin, you need to get in touch with us at Verus Metrology. Contact us today.
Andrew Hodson is the Managing Director of Verus Metrology, an Atlantic MedTech Cluster member. You can find out more about the services it offers, including metrology fixture design, by visiting its website.